To add or edit a Blog Post:
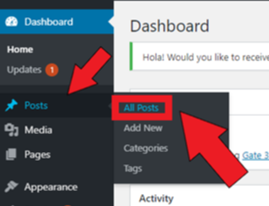
1. Navigate to the “Posts” menu item and select “All Posts” on the left-hand side of the WordPress dashboard.

2. The blog posts on your site will now display. To add a new post, click the “Add New” button.

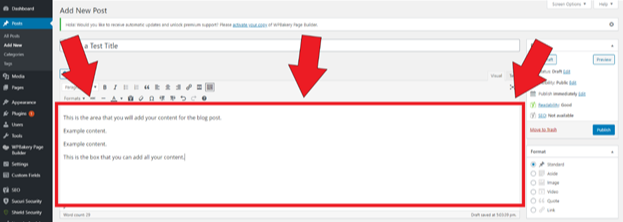
3. Enter your post Title into the post page.

4. To enter the Content for the blog post, use this box:

5. To insert an image or chart, click on the “Add Media” button where you want to insert it into the post.
6. Select the chart or image you want to use from the Media Library and click on the “Insert into post” button on the bottom right. The graphic will be inserted where the curser is in the post.
7. To edit the alignment or size, click the image and utilize the options from the dialogue box that appears.
8. If you would like to continue to work on the post and go back to it, you can save it as a “Draft.” If you are ready for the post to go live, you can select the category it belongs to, and then click on “Publish.”

