Properties are used to store data on certain objects in HubSpot, such as contacts, companies, deals, tickets, and products. When you need additional properties to gather information for your business processes, you can create new custom properties.
Create custom properties
- In your HubSpot account, click the settings icon settings in the main navigation bar.
- In the left sidebar menu, navigate to CRM > Properties.
- In the upper right, click Create property.
- Object type: select the object type that the property will be for.
- Group: select the property group the property should belong to.
- Label: enter text to name the property.
- Description: enter text to describe the property.
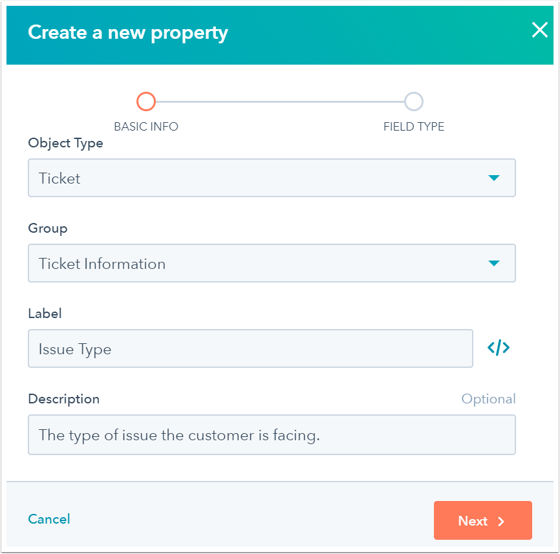
- Click Next.
- Click the Field type dropdown menu and select a field type for this property.
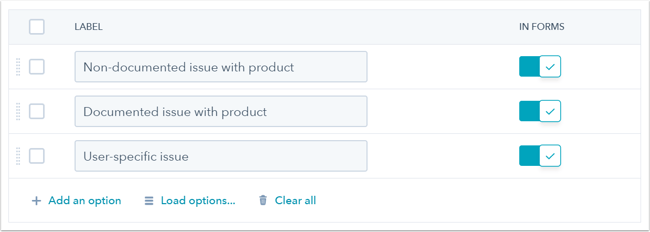
- For field types with options (i.e., Multiple checkboxes, Dropdown select, and Radio select field types), enter the different options for the property.
- Label: enter the name of the option.
- In forms: click to toggle the switch on to include the option for forms.
- Add an option: click to add a new option.
- Load options...: click to load multiple options at once. You can select a default set of options, such as Country and Timezone, paste text to create options in bulk, or copy the options from an existing property.
- Clear all: click to remove all existing options.
- By default, the property will be included as an option for fields in your HubSpot forms, pop-up forms, and bots. If you don't want the property to be an option, clear the Show in forms checkbox.
- Click Create.
Edit properties
You can edit an existing property as long as no existing objects have a value for the property, and the property isn't actively being used by another tool in HubSpot, such as Lists or Workflows.
To edit an existing property:
- In your HubSpot account, click the settings icon settings in the main navigation bar.
- In the left sidebar menu, navigate to CRM > Properties.
- Locate the property you want to edit.
- In the upper left, click the filters:
- [Object] properties: click and select an object type to filter only properties from that object type.
- All groups: click and select the group to filter only properties in that specific group.
- All field types: click and select to filter properties by a specific field type.
- All users: click and select to filter properties created by a specific user.
- In the upper right, search for your property by name in the search box.
- To sort your properties, click the column header.
- In the upper left, click the filters:

- Click the property's name.
- In the right panel, edit your property.
- Update your property's name.
- Click the Basic info tab to update basic information about the property.
- View the number of contacts with a value for the property.
- Edit the Internal description for the property.
- Update the Group that the property is in.

- Click Save once you're done.