Create a landing page with a starter template
To create a new landing page with a starter template:
- In your HubSpot account, navigate to Marketing > Website > Landing Pages.
- In the upper right, click Create > Landing page.
- In the left sidebar menu, click All of your templates.
- At the top, click the Filter by source dropdown menu and select Starter.
- Hover over a template, and click Preview in the upper right.

- To create a page with this template, click Use template in the upper right.
Edit your page content
Starter templates contain modules, which are blocks of website content. These modules may be arranged in horizontal rows or vertical columns.
Rows and columns may be grouped into sections of elements. By grouping elements together, you can apply background styles to an entire area of your page. You can also drag and drop these elements to rearrange your landing page layout.
Customize fonts, colors, and buttons
To customize the default styles for your starter template, click the Design tab in the left panel. You can also customize the background color or image for a specific row, column, or section of your page.
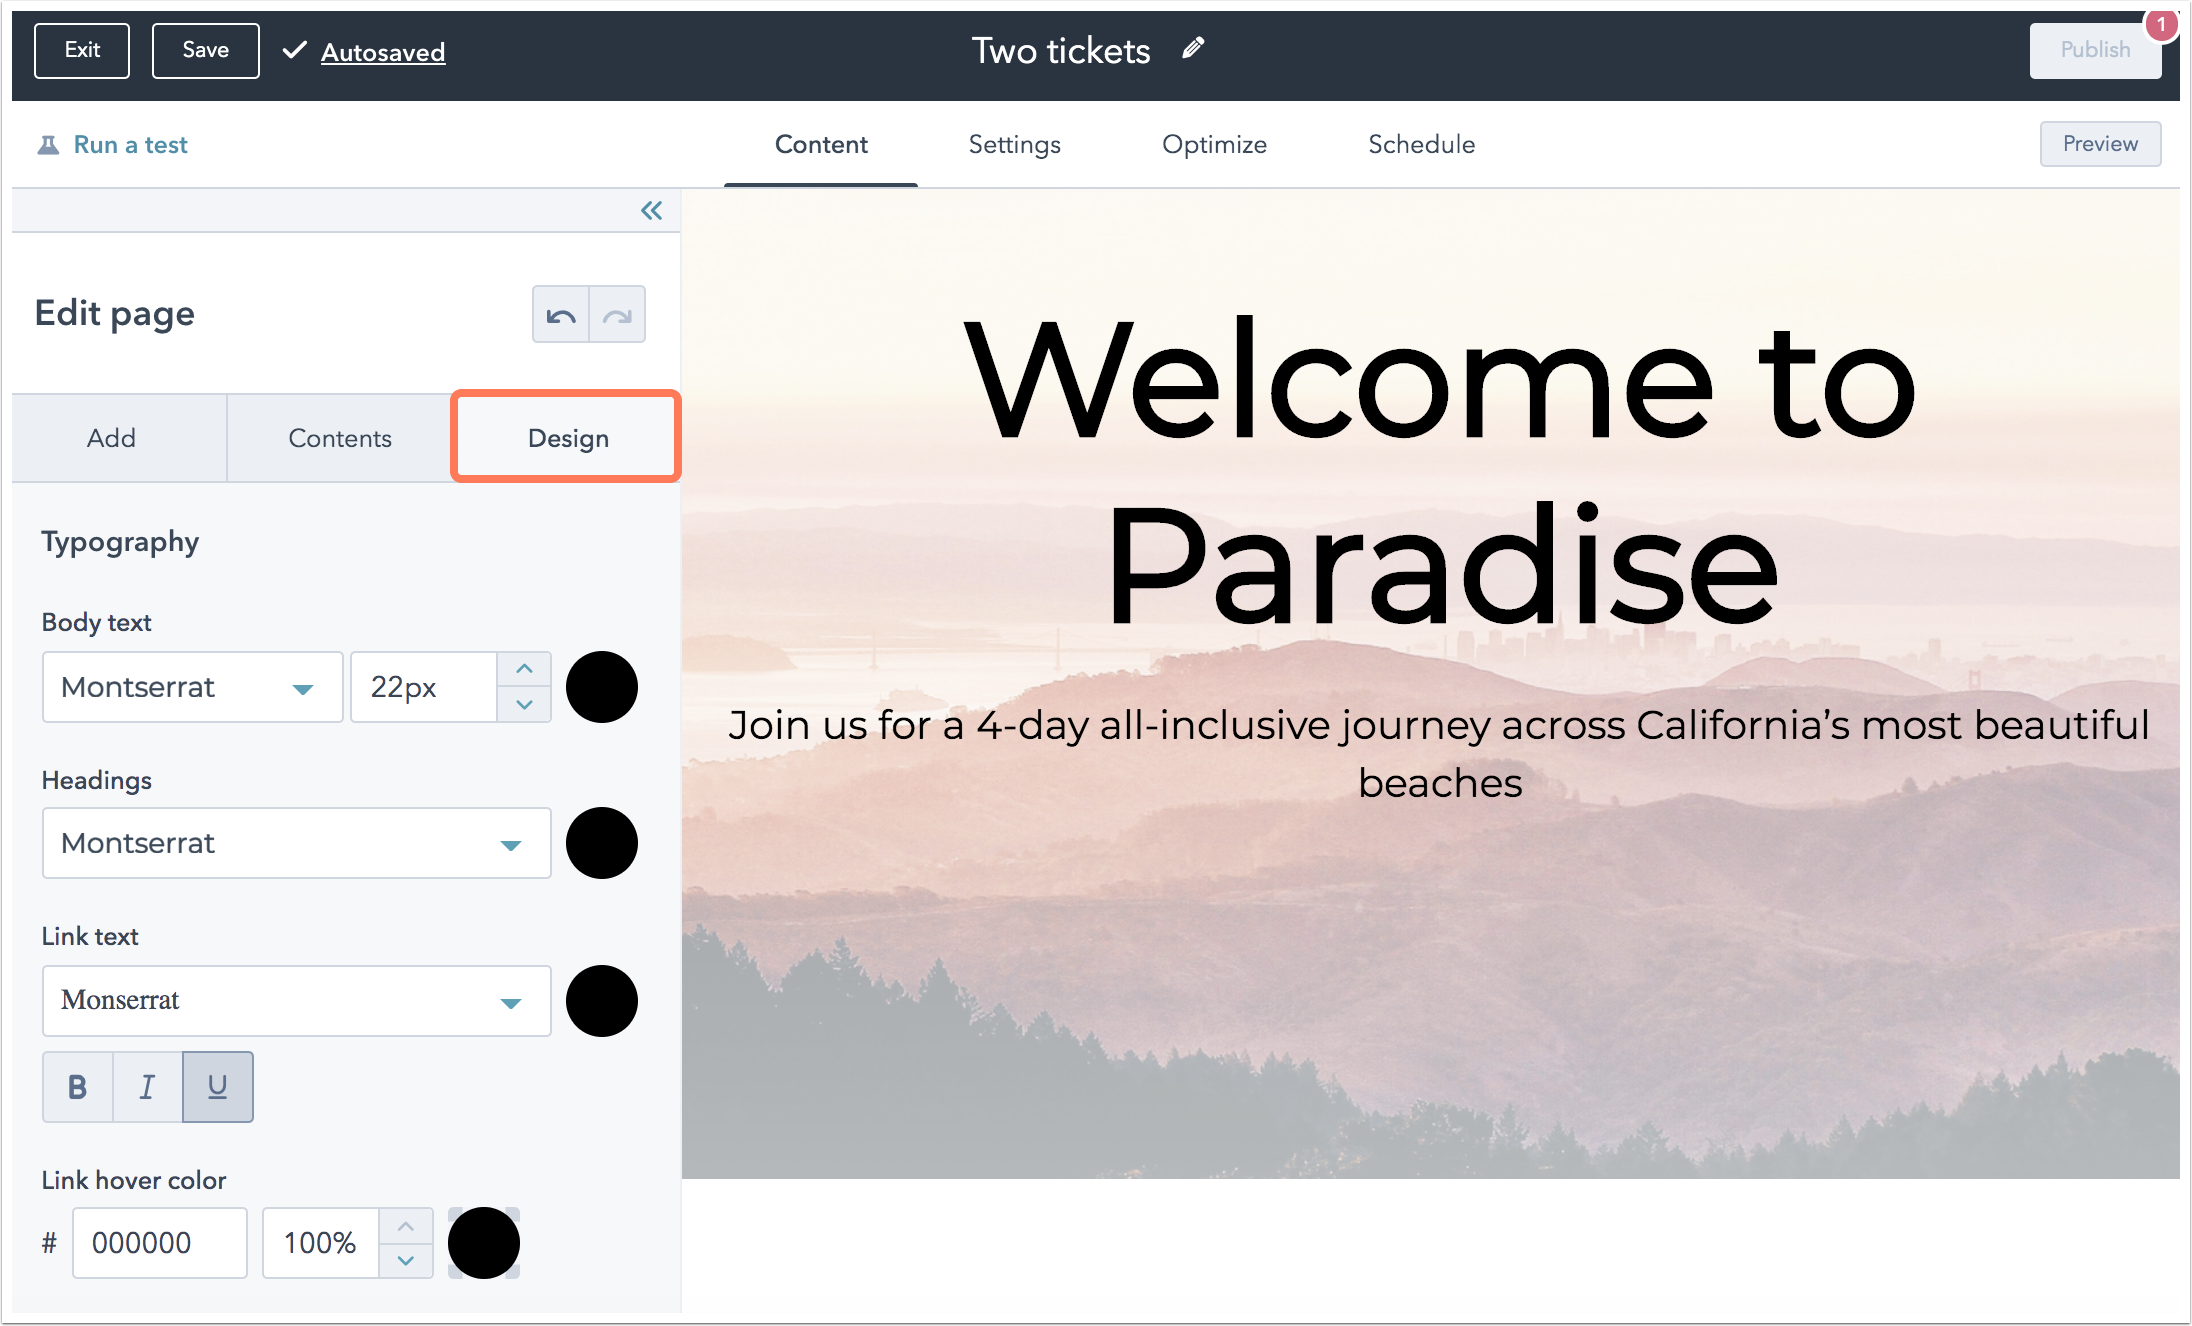
Typography
In the Typography section, edit the fonts and font styles applied to your page body and headings. All Google fonts are supported.
- Body text: customize the font, font size, and font colors for the main body of your page:
- Click the Body text dropdown menu to select the a font.
- Click the arrow keys to select the font size.
- Click the color bubble to set a color for your font. To set a custom color, click the Advanced tab and enter a hex value.
- Headings: customize the font and color for any text in your modules with a heading tag.
- Click the Headings dropdown menu to select a font.
- Click the color bubble to select a font color.
- Link text: customize the fonts and colors applied to links on your page.
- Click the Link text dropdown menu to select a font.
- Click the color bubble to select a link color.
- Click the styling buttons or dropdown menu to select the styles applied to your link text, including whether you want your links to be underlined on the page.
- To customize the way links appear when your visitors interact with your page, you can customize the link color and transparency.
- Link hover color: customize the color and transparency of link text when a visitor hovers over the links on your page.
- Active link color: customize the color and transparency of link text by default, before the link is clicked.
- Visited link color: customize the color and transparency of link text after it's been clicked by a visitor.
Buttons
In the Buttons section, customize the way simple buttons and form submit buttons are styled on the page.
- Button background color: customize the color applied to the background of your buttons.
- Enter a hex value or click the color bubble to select a color.
- Enter a percentage value or click the arrow keys to set the transparency of your button background color.
- Button text color: the color applied to the text of buttons on your page.
- Enter a hex value or click the color bubble to select the color for the text.
- Enter a percentage value or click the arrow keys to set the transparency of your button text color.
- Button corner radius: customize the the shape of your form buttons by entering a value or dragging the slider. A higher value means the buttons on your page will have rounder edges. A value of zero means your buttons will be rectangular.
Optimize your page for search engines
In the top navigation, click the Optimize tab to open to the SEO optimizer tool.
Edit your page settings
Click the Settings tab to customize your page details.
- Internal page name: the internal page name is the name you added when you first created the page and is referred to in the dashboard. It is not shown to visitors.
- Page title: the title that displays in the tab at the top of your web browser when the page loads.
- Page URL: the URL for your page appears in the URL bar within the browser when visitors navigate to this page. You can customize the Content slug for your page URL.
- Meta description: the content that will appear in search results below the page title.
- Featured image: click to toggle this switch on for a specific image to be featured when your page is shared on social media. Click Upload to select an image from your computer.
Preview and publish your page
Before your page goes live, click Preview in the upper right to test how your page will appear on a mobile device. You can test how personalization or smart content will appear to your visitors in the page preview.
Once you're satisfied with your page's preview, click Publish in the upper right.