Creating a New Email
In your HubSpot account, navigate to Marketing > Email.
Click Create email.
On the Drag and drop tab, choose a template based on the type of email you want to create. Each email template has customizable elements such as images and text fields, which are grouped into sections.
Editing an Email Layout and Content
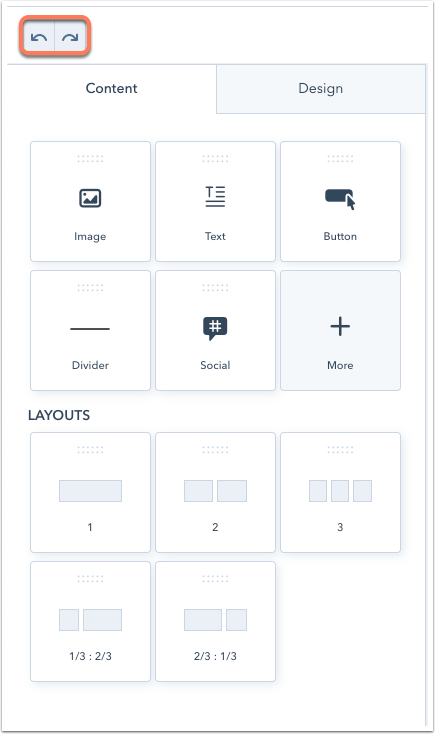
To add more content to your template, click and drag a new element from the Content tab in the left pane directly into the email editor.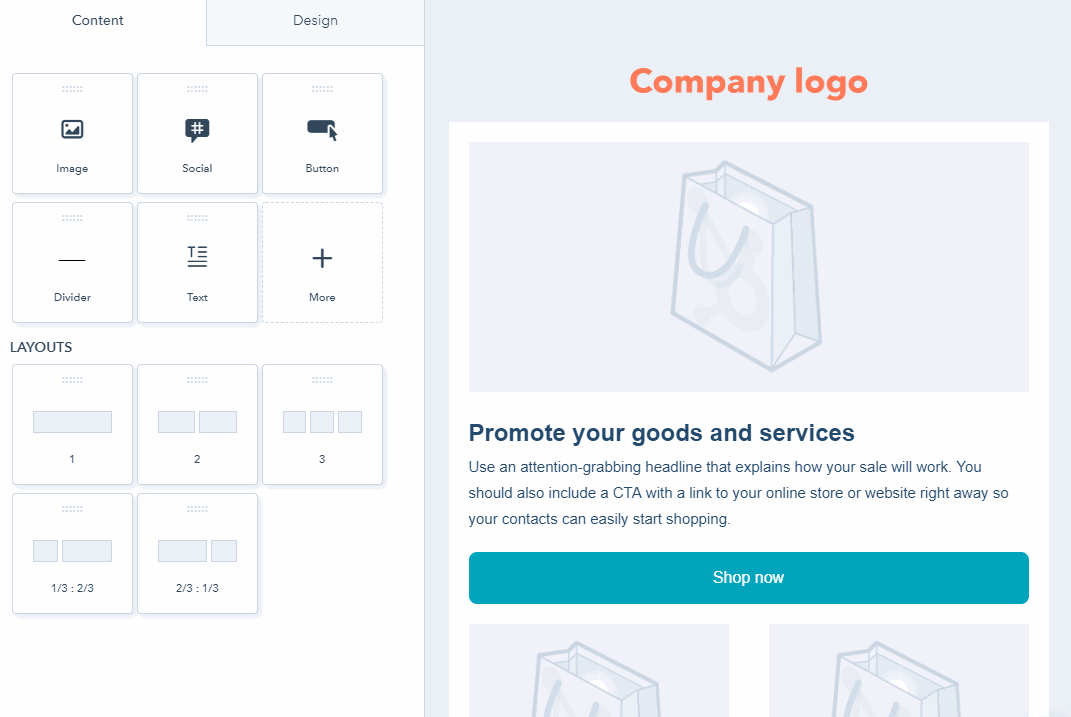
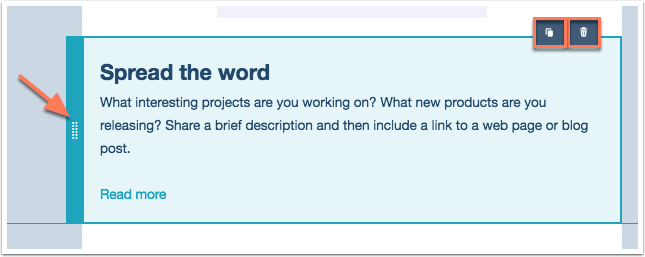
To modify your template layout, hover over an element and click the blue edge on the left to drag it to a new position. Click the clone icon or trash can icon to clone or delete the element.
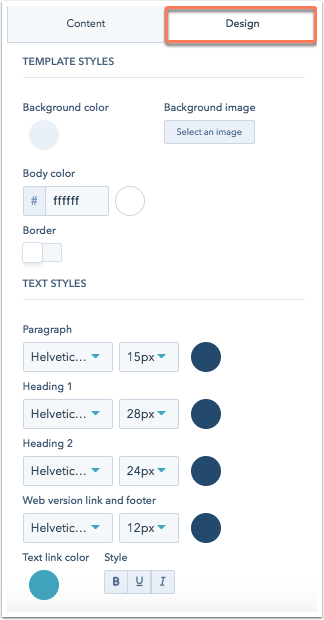
Click the area just outside your email content to select a section of elements to modify in the left sidebar. In the Section settings, you can:
- Specify the number of columns and how they should be arranged in that section under Column layout.
- Customize spacing, colors, and patterns for that section of your email.
Click an element to customize its content.
Images, buttons, and dividers can be customized in the left pane.
Text elements can be edited inline and styled with the rich text toolbar. You can insert emojis into your text field by clicking the emoji icon.
Please note: if your email is larger than 102KB, you'll see an alert that Gmail will clip some of your email content for your recipients. Going over this size limit may impact the design of the email, unsubscribe links, and the pixel used to track email opens. You'll see an alert in the content editor and the Review panel if the email is likely to be clipped.
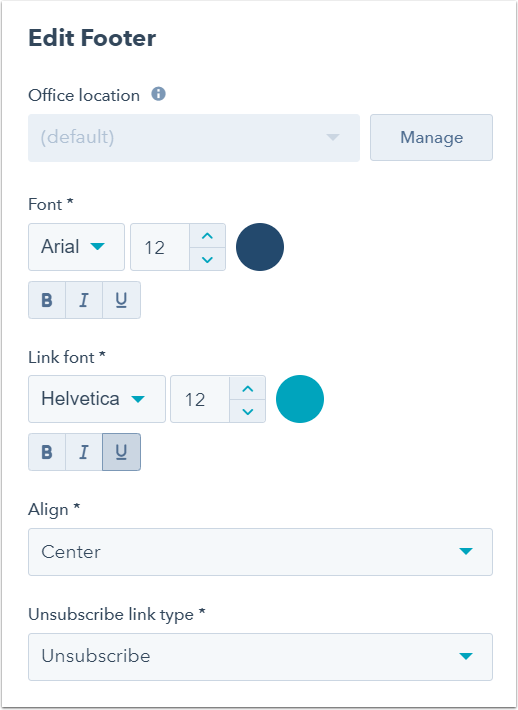
Click the footer to edit your office location information. In the left sidebar, click Manage to update your office address. Update the style of your text in the Font, Link font and Align options, and click the Unsubscribe dropdown menu to select an unsubscribe link type.
You can add personalization to your text by pulling in values directly from the contact records of your email recipients.
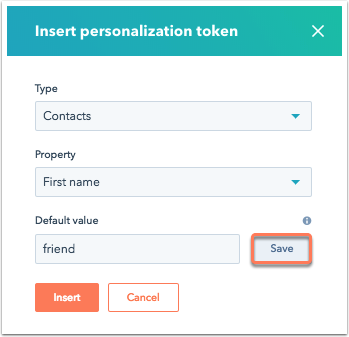
- In the formatting bar, click the Insert personalization token icon contacts.
- Click the Type dropdown menu to select whether the token will come from the Contact record or its associated Company record.
- Click the Property dropdown menu to select which property value to pull into the email body.
- Enter a default value that can be used for any contact without a value for this property and click Save. Then, click Insert to add the token to your text.
If you make any mistakes while you're editing your email, you can undo any of your recent changes. Or, if you want to restore a change you just undid, you can also redo a change to restore your email back to the most recent revision:
- In the top left of the editor, click the undo icon to undo the most recent change. To revert back to a change you just undid, click the redo icon.
- The editor also supports standard keyboard shortcuts. On Windows, you can press Ctrl + Z to undo and Shift + Ctrl + Z to redo. On Mac, you can use Command + Z to undo and Shift + Command + Z to redo.
Editing Email Settings
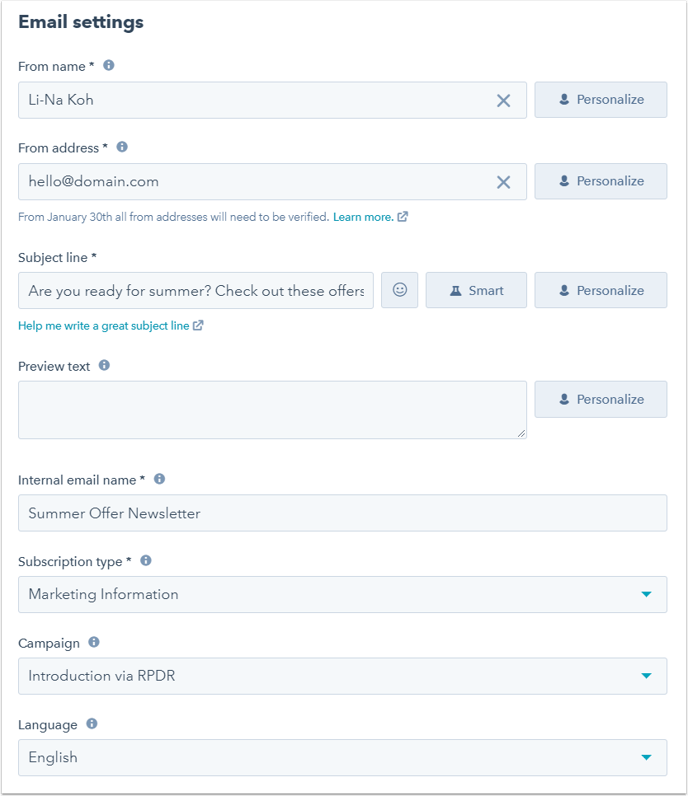
At the top of the screen, click the Settings tab. Here, you can customize the following settings:
- From name: the name your recipients will see when they receive the email.
- Click the dropdown menu to select a HubSpot user in your account, select the {{ owner.first.name }} token to automatically pull in the first and last name of the user assigned as the contact owner for each recipient, or enter a new name.
- Click contacts Personalize to use personalization to pull in a name stored as a property on the contact record.
- From address: the email address the email is sent from.
- Click the dropdown menu to select the email address of a HubSpot user in your account. Select the {{ owner.email }} token to automatically pull in the email address of the HubSpot Owner for the recipient, or enter a new email address.
- If you want email replies to go to the From address, keep the Use this as my reply-to address checkbox selected.
- If you want email replies to go to a different address, deselect the Use this as my reply-to address checkbox and enter another email in the Reply-to address field.
- Click contacts Personalize to use personalization to pull in an email address stored as a property on the contact record.
- Click the dropdown menu to select the email address of a HubSpot user in your account. Select the {{ owner.email }} token to automatically pull in the email address of the HubSpot Owner for the recipient, or enter a new email address.
- Subject line: the email subject line that appears in an inbox.
- Enter your email subject in the Subject line field.
- Click the emoji icon to add emojis to your subject line.
- Click test Smart to make the subject line smart (Marketing Hub Professional and Enterprise only).
- Click contacts Personalize to insert a personalization token.
- Preview text: add preview text that usually appears next to the email subject line in an inbox.
- Internal email name: the internal name of the email that appears in the email dashboard. This name is not visible to email recipients.
- Subscription type: select the email subscription type.
- Campaign: select a campaign to associate with the email.
- Language: select the language your email footer text and web version link text will appear in at the bottom of your email.
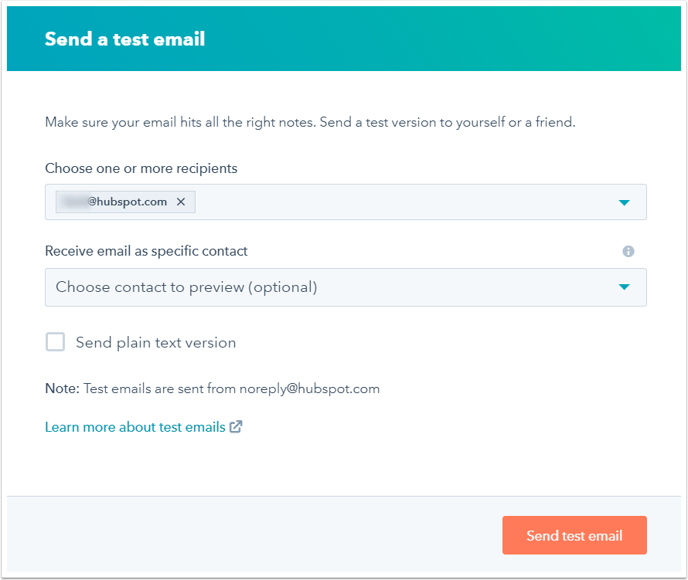
You can also send a test email to yourself or another user in your account:
- In the upper right, click the Actions dropdown menu and select Send test email.
- In the right pane, click the Choose one or more recipients dropdown menu to select recipient(s) for your test email.
- (Optional) Click the Receive email as specific contact dropdown menu to preview the email as it will appear to a specific contact. This is useful for testing personalization.
- Click Send test email.
Sending or Scheduling Your Email
- In the upper right, click Next.
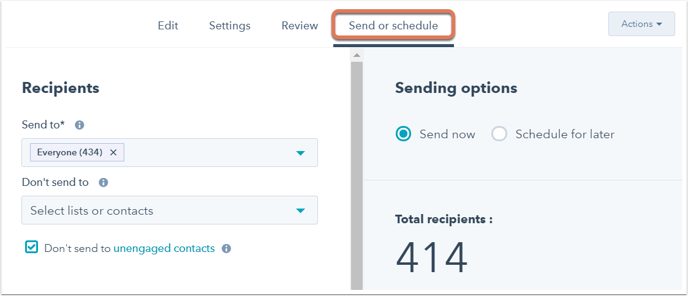
- Click the Send to dropdown menu and select the list(s) and/or individual contact(s) to add them to the recipient list.
- Click the Don't send to dropdown menu and select the list(s) and/or individual contact(s) to exclude them from the recipient list.
- Click the Don't send to unengaged contacts checkbox to exclude contacts with low engagement. This feature is best used after you've already sent a few email campaigns from HubSpot, so there is data to identify your unengaged contacts.
- In the right sidebar, choose a sending option and see how many contacts will receive your email:
- Select Send now to send your email right away, or select Schedule for later to send it at a specific date and time in the future.
- You can see how many contacts will receive your email under Total Recipients, based on the lists and individual contacts you selected. If you've chosen a list to include, the Total Recipients number will not count any contacts from the list who've unsubscribed from or never subscribed to your marketing emails.
In the upper right, click Review and send to review warnings for your email.
After you've sent or scheduled your email, you can send it to more recipients if you forgot to include them when you first created the email:
- In your HubSpot account, navigate to Marketing > Email.
- Click the name of the sent or scheduled email that you'd like to send to additional recipients.
- In the upper right, click the Actions dropdown menu, then select Send to More.
- Click the Send to dropdown menu and select the list(s) and/or individual contact(s) to add them to the recipient list.
- Click the Don't send to dropdown menu and select the list(s) and/or individual contact(s) to exclude them from the recipient list.
- Click the Don't send to unengaged contacts checkbox to exclude contacts with low engagement.
- Click Send.