Add reports to your dashboard
To add a new report to your dashboard:
- In your HubSpot account, navigate to Reports > Dashboards.
- Click Add report to access the report library.
Note: a dashboard is limited to a certain number of reports. If you want to add more reports, you can create a new dashboard or remove reports from the current dashboard.
- In the report library, search or browse for reports, then save it to the dashboard.
Filter reports on your dashboard
The data a report will display depends on its filters. For better analysis, you should filter the data to a specific date range, specific owners or teams, or specific pipelines. You can filter all reports on a dashboard, or filter individual reports.
Filter all reports on your dashboard
To filter your entire dashboard:
- In your HubSpot account, navigate to Reports > Dashboards.
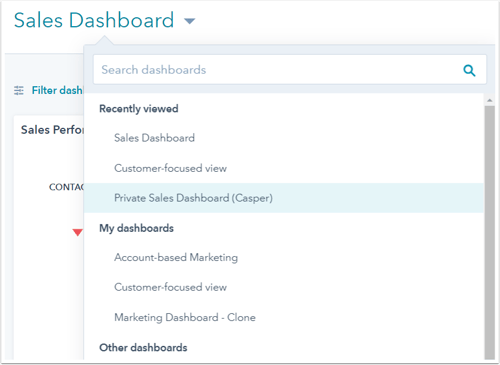
- Click the name of the current dashboard, then select the dashboard you want to filter from the dropdown menu.
- In the upper left, click Filter dashboard. Any existing filters will be next to Filter dashboard. To edit such existing filters, click the filter to view its options.

Select a filter you want to apply to your dashboard. The options vary depending on the reports in your dashboard:
- Date range: set a default date range for all reports on your dashboard.
- Click the Date range dropdown menu and select a preset date range or select Custom date range to set your own.
- Click the Frequency dropdown menu to set the time interval for data in your reports.
- Click Apply.

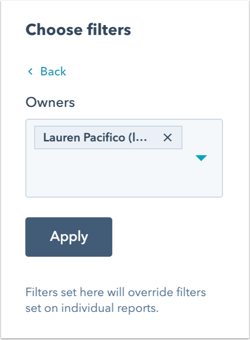
- Owners: filter any record-based reports on your dashboard by owners in your account. Click the Owners dropdown menu to select one or more owners. Click Apply.
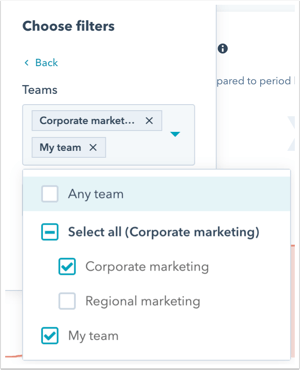
- Teams: filter record-based reports on your dashboard by teams in your account. Click the Teams dropdown menu, then select the checkbox of the teams you want to filter your dashboard by. Click Apply.
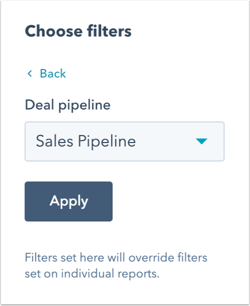
- Deal pipeline: filter deal-based reports on your dashboard by a deal pipeline. Click the Deal pipeline dropdown menu and select a pipeline, then click Apply.
- Ticket pipeline: filter ticket-based reports on your dashboard by a ticket pipeline. Click the Ticket pipeline dropdown menu to select a pipeline, then click Apply.

Filter a specific report on your dashboard
- In your HubSpot account, navigate to Reports > Dashboards.
- Click the name of the current dashboard and select the dashboard you want to view.
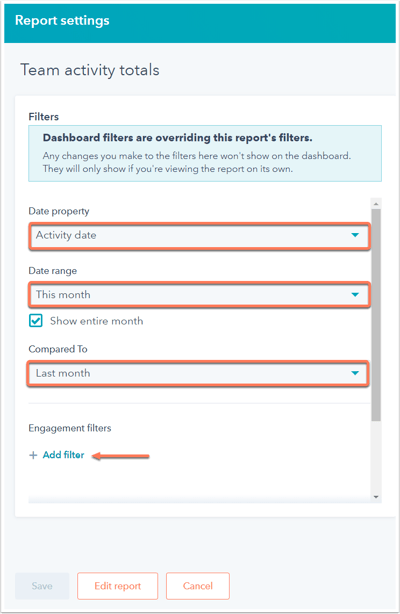
- Hover over the report you want to filter and click Report settings.
- In the dialog box, you can add filters the data in the report.
- In the Date range section, click the dropdown menus and select the date range.
- To add other filters, click add Add filter. The filters and options depend on the type of report you're filtering (e.g., a landing page report will have a URL filter and options, where a template report will not).
- Once done, click Save.
- For certain reports, when you click the vertical ellipses icon, you can select Customize in the dropdown menu. In the dialog box, you can customize it. These options are specific to these reports.
Edit custom reports (Professional, Enterprise, and Reporting add-on)
If you are a Professional, Enterprise, or Reporting add-on user, you can customize the reports on your dashboard.
To edit a report on your dashboard:
- In your HubSpot account, navigate to Reports > Dashboards.
- Click the name of the current dashboard, and select the dashboard from the dropdown menu.
- Hover over the report you want to edit and click Report settings.
- In the dialog box, click Edit report at the bottom to go to the custom report builder. Once you're done, you can click Save in the upper right to update the report.

Move and resize reports
- In your HubSpot account, navigate to Reports > Dashboards.
- Click the name of the current dashboard and select the dashboard from the dropdown menu.
- To reorganize the reports on your dashboard, click the report you want to move.
- Drag and drop the report to the desired location on your dashboard.
- To resize a report to be half or full width of the dashboard, hover over the bottom right corner of the report. When the dotted sizing arrow appears in the corner, hold your left mouse button down and drag left or right to increase or decrease the size.
Rename, clone, remove, or delete reports
- In your HubSpot account, navigate to Reports > Dashboards.
- Click the name of the current dashboard and select the dashboard from the dropdown menu with the reports you want to edit.
- Hover over the report and click the Actions dropdown menu:
- Rename: select to rename a report. In the dialog box, enter a new name in the New report name field, then click Save.
- Clone: select to clone the report. In the dialog box, enter a name for your new report and you can choose to add the new report to an existing dashboard or create a new dashboard to add it to. Click Clone to existing/new dashboard.
- Remove from dashboard: select to remove a report from the dashboard but not delete it.
- Delete: select to delete a report completely from your HubSpot account.
Customize your dashboard settings
Super Admins or users with Account access toggled on and the Edit reports and dashboards permission enabled in your account can view and make changes to all dashboards, regardless of visibility or ownership. Otherwise, a user can only make changes to dashboards they own or have access to.
- In your HubSpot account, navigate to Reports > Dashboards.
- Click the name of the current dashboard and select the dashboard you want to edit from the dropdown menu.
- You can update the privacy setting for your custom dashboard. In the upper right, click the Assigned dropdown menu and click Edit access. In the right panel, select who should be able to access the dashboard.

- Private to owner: select to allow only your user and your admins to view and edit the dashboard. A Super Admin can only select this if they are the owner of the dashboard.
- Everyone: select to allow all users in your HubSpot account to view the dashboard.
- Select View and edit to allow all users to view and edit the dashboard.
- Select View only to allow all users to view, but not edit, the dashboard.
- Only specific users and teams (Enterprise only): select to allow specific users and teams in your HubSpot account to view the dashboard.
- Select View and edit to allow specific users to view and edit the dashboard. Click Next in the bottom right and select the users and teams that will have view and edit access to the dashboard and click Save.
- Select View only to allow specific users to view, but not edit, the dashboard. Click Next in the bottom right and select the users and teams that will have view access to the dashboard and click Save.

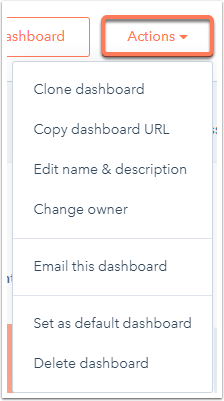
- In the upper right, click the Actions dropdown menu and select an action:
- Clone dashboard: select to clone the existing dashboard. In the right panel, enter the cloned Dashboard name and select the users who will have access to the cloned dashboard. Once selected, click Clone dashboard.
- Copy dashboard URL: select to copy the dashboard URL that you can share with other users in your HubSpot account.
- Edit name & description: select to rename the dashboard and edit its description. In the right panel, edit the Dashboard name and edit the Dashboard description. Once done, click Save.
-
- Change owner: select to change the dashboard's owner. In the right panel, click the Dashboard Owner dropdown menu and select the new owner. In the bottom right, click Save.
- Email this dashboard: select to email the dashboard to a team member.
- Set as default dashboard: select to make the dashboard your default. In the dialog box, click Set as default. Going forwards, this dashboard will be shown to you when you log in, or when you click the HubSpot sprocket in the top left.
- Delete dashboard: select to delete the dashboard. To keep the custom reports in your reports list, clear Also delete all reports in this dashboard. To confirm the deletion, click Delete dashboard.