Before getting started, note the difference between a tracked email and a logged email:
- Tracked email: with tracking enabled, you'll be notified when the contact opens the email. Emails that are tracked, but not logged, do not get recorded on a contact timeline in HubSpot.
- Logged email: a logged email is recorded on the recipient's contact timeline in HubSpot. Any attachments included in the email will also log to the contact's record. You can keep a record of your email communication with a prospect in HubSpot to help you understand where they are in your sales funnel. You can also use this history of logged emails to keep track of past relations and make sure you're communicating regularly with your most promising leads. Logged emails are for recording your interactions with the contact and do not give you insight into open or click information.
Tracking emails
To send a tracked email using the Outlook desktop add-in from your Outlook desktop account on a PC:
- Log in to your Outlook account.
- Compose a new email.
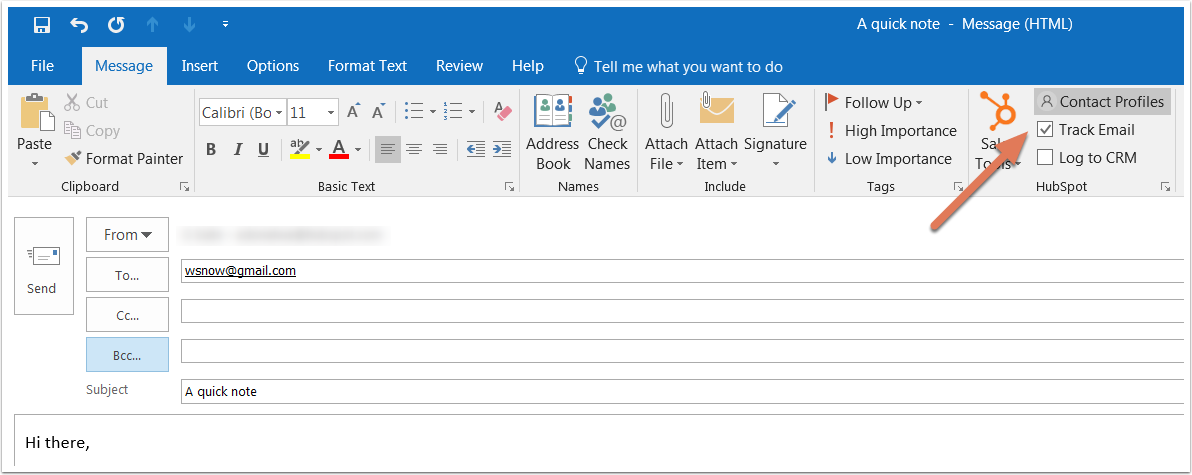
- Enter the email recipient, subject line, and email body.
- Select the Track Email checkbox in the message ribbon, then click Send.
View the tracked email's status
Before your contact opens the email, the email subject line and recipient will show in your activity feed in HubSpot as Sent.

You can also see how your contacts are engaging with your tracked emails from the Windows tray app. To access your activity feed from the Windows tray app if you've installed HubSpot Sales for Windows. Click the HubSpot sprocket icon sprocket in your Windows tray.
Once the recipient opens the email, you'll receive a real-time pop-up notification on your desktop. When you navigate back to your activity feed, you'll see the email information marked as Open. Click the Show all activities dropdown menu below the contact's name to see when the recipient opened your email. You will also see a history of the contact's activities listed in the dropdown menu.

Logging emails
To log an email and add new contacts to HubSpot from a logged email, the email address you send from in your email client must be one of the following:
- A user in your account.
- One of your connected email addresses.
- An alias in your email client (either an alias that has been configured in your connected Gmail inbox, or an alias added to your Profile & Preferences).
You can specify email addresses and domains that you never want to log emails for in your HubSpot account settings. Or you can add these email addresses and domains in your add-in settings.
Please note: emails larger than 30 MB will not log to your HubSpot account. Attachments count towards this limit. Your email will still be delivered successfully to the contact, but you will not see the email logged to their record.
To send a logged email using the Outlook desktop add-in from your Outlook desktop account on a PC:
- Compose a new email in Outlook.
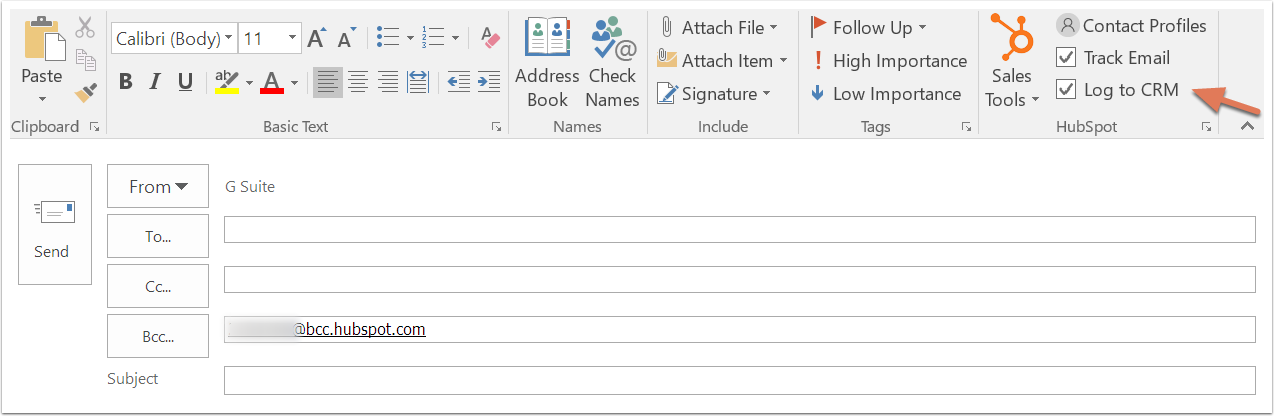
- Enter the email recipient, subject line, and email body.
- In the message ribbon, select the Log to CRM. Your BCC address will auto-populate in the BCC field.
- Click Send.
View the logged email in HubSpot
Email that are logged to HubSpot using the Outlook desktop add-in will automatically be associated to the recipient's contact record, its associated company record, and the five most recent open deal records associated to the contact.
To see the logged email in HubSpot:
- In your HubSpot account, navigate to your contacts, companies or deals.
- Click the name of the record.
- On the timeline, locate the logged email. From the email, you can do the following:
- Associated records: click to edit associated company or deals records.
- Pin: click to pin the email to the top if the contact timeline.
- Delete: click to delete the email activity from the timeline.
- Details: click to see specific information about the email send.
- Expand: click to see the full body of the email. If there's an ongoing email conversation, click View thread to see all of the emails in the thread.
- Attachments: click to open attachments associated with this specific email send.
- Reply: click Reply to send an email reply to the contact from HubSpot.