
The WordPress Media Library stores all the images, PDFs and other files used on your website. You can upload files there and then add them to any page or post.
Before you upload
- Resize large images. Photos straight from a camera or phone are often much larger than needed and can slow down your site. For most images, a width of 1,920 pixels or less is plenty, and under 500 KB is a good target. Free tools such as Squoosh can resize and compress images.
- Use the right format:
- JPG for photos.
- PNG for logos or graphics with transparent backgrounds.
- WebP or AVIF for smaller file sizes, if your site supports them.
- Name files clearly. Use descriptive names like
farm-equipment-tractor.jpgrather thanIMG_4032.jpg. This helps with search engines and makes files easier to find later.
Upload files to the Media Library
- Log in to WordPress with your username or email address and password.
- In the left sidebar menu, click Media.
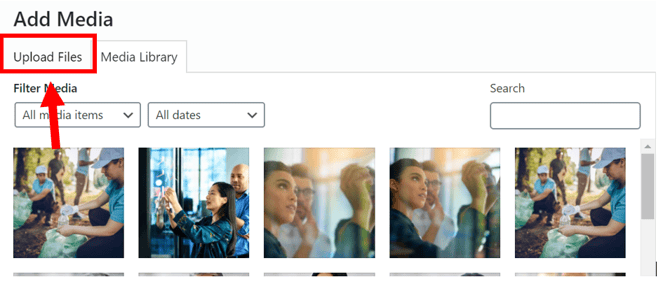
- At the top of the Media Library, click Add New Media File. In some versions it's called Add New or Upload Files.
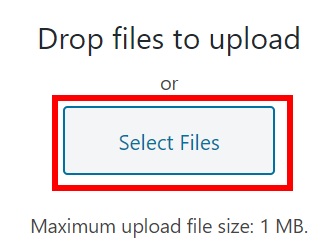
- Click Select Files and choose the files from your computer, or drag and drop them into the upload area. You can upload several files at once.
Please note: the upload screen shows your site's maximum upload file size. If a file is larger, resize or compress it before uploading.
Add alt text and details
After uploading, click the image in the Media Library to open its details:
- Alternative text (alt text): a short description of the image, for example "Farmer inspecting soybean crop at sunrise." Screen readers use it for visitors with visual impairments, and search engines use it to understand the image. Add alt text to every image except purely decorative ones.
- Title and caption: optional. A caption may show below the image on your site, depending on your theme.
- File URL: click Copy URL to clipboard if you need a direct link to the file.
Upload an image while editing a page
You can also upload images directly while editing a page or post:
- Click the + icon and add an Image block.
- Click Upload to add a new image from your computer, or Media Library to choose one you've already uploaded.
- Add alt text in the block settings on the right.
Replacing an existing image
WordPress doesn't overwrite files. Uploading a new version of an image creates a new file, and pages keep showing the old one until you update them:
- Open the page in the editor.
- Click the image, then click Replace in the block toolbar.
- Choose the new image, then save the page.
Still seeing the old image? Your site or browser may be showing a saved (cached) copy. Try a hard refresh (Ctrl+Shift+R on Windows or Cmd+Shift+R on Mac) or view the page in a private browsing window. If it still doesn't update, contact Gate 39 and we'll clear the site's cache.
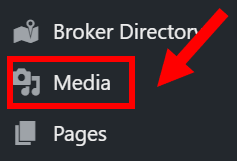
Click Upload Files.
Click Select Files, then select the file from your computer you wish to upload.
Need help? Contact the Gate 39 team through the Customer portal.
References
[1] WPBrigade – Everything New in WordPress 7.0
[2] Make WordPress Core – WordPress 6.5 adds AVIF support