1. Open the Page in Bricks
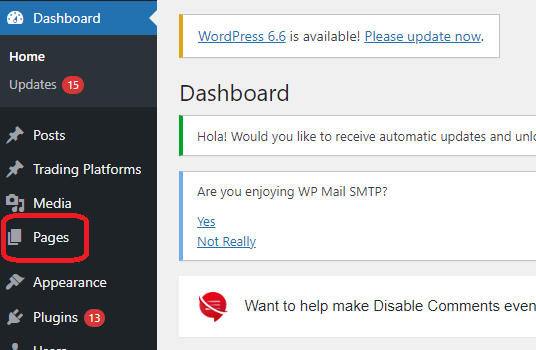
From the WordPress Dashboard, go to Pages in the left sidebar.

2. Find the Content You Want to Edit
Once the Bricks editor opens, navigate to the content you want to update.
Bricks pages are built using different elements, such as headings, text, images, buttons, sections, and containers.
Click an element directly on the page to select it. You can also use the Structure panel to find and select elements, which can be helpful when working with more complex page layouts.
3. Edit the Content
After selecting an element, its available settings will appear in the Bricks panel.
For text-based elements, you can also click directly into the text on the page and begin editing.
Depending on the element, you may have options to update:
- Text and other content
- Images
- Links and buttons
- Styling
- Spacing and layout
- Other element-specific settings
Be careful when changing layout or styling settings, as these changes may affect the overall page design.

4. Check the Page on Different Devices
Before saving, use the breakpoint controls in the Bricks toolbar to review your changes on different screen sizes.
Check the page on desktop, tablet, and mobile to make sure the content and layout display correctly.
Keep in mind that some styles may be configured differently at different breakpoints.
5. Save Your Changes
When you're finished editing, click the Save icon in the Bricks toolbar to save your changes.
You can also use Ctrl + S on Windows or Cmd + S on Mac.
If you're working on an unpublished draft, saving your changes does not automatically publish the page. Use the Publish option when the page is ready to go live.
After saving or publishing, preview the page on the frontend to make sure everything appears correctly.

6. Clear the Website Cache if Needed
If your changes have been saved but do not appear immediately on the live website, the website may be displaying a cached version of the page.
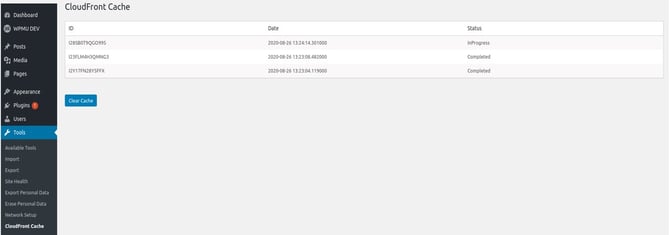
Depending on your website configuration, you may need to clear the cache through a WordPress caching plugin, your hosting provider, CloudFront/CDN, or another caching service.
If your Gate 39-managed website uses CloudFront Cache, go to Tools → CloudFront Cache from the WordPress Dashboard and click Clear Cache.